Wednesday, March 02, 2011

Reading in a *snap*

When I was getting my master's degree last year, my big project was on sight word fluency.  If I have a soap box, that's it.  We teach around 100 sight words over the course of the year and I always have students who struggle.  Then I found SnapWords in my research and fell. in. love.
{click the picture to get to Child 1st publications}

With PTA incentive money we received from our fall fundraiser, I purchased the full set of SnapWords cards for all levels.  The flashcards {which all have a visual definition clue and action} were specifically created to reach kids who are right-brained learners.  While many of my students are not labeled or diagnosed with anything when they enter my classroom, those that struggle often end up qualifying for some additional services in later grades.  These were created for students with ADHD, autism or dyslexia but my higher level readers also enjoy the picture clues and movement.  Somewhere along the way I was sent a file with ch/th/sh/wh digraphs.  I decided to use them separately in a guided reading lesson so the kids would recognize those chunks when reading {the sounding out of t-h drives me bonkers!} but they've really started to utilize them a lot during writing.  Double whammy!

{church is my favorite because it has /ch/ at the front AND back!}

{this is also helping my speech students to not count one, two, free...}

{"shirt" is the reason I wrote the labels...we could not afford any misspellings!}

Tuesday, March 01, 2011

shapes. SHAPES! shapes. SHAPES!

If you have any Greg & Steve CDs then you probably know exactly where that came from.  And I apologize up front that you'll have it in your head for the remainder of the evening.  If your kids don't know that song, you can get it here.  But don't blame me when you're singing it going to bed!!  ;)

We just started our shapes unit in math and have done some fun things to get the unit started.  Some are from our Investigations curriculum, some have been modified from the Investigations curriculum and some are just other activities.  All in all, we've had a good first two weeks exploring and comparing shapes.

{SHAPES!}

Our first project was to create a shape poster.  The kids all cut out multiple pictures the first day and we started the poster whole group.  For the remainder of the week the poster was in a center and a few kids at a time were challenged to cut out shapes we didn't have well represented.


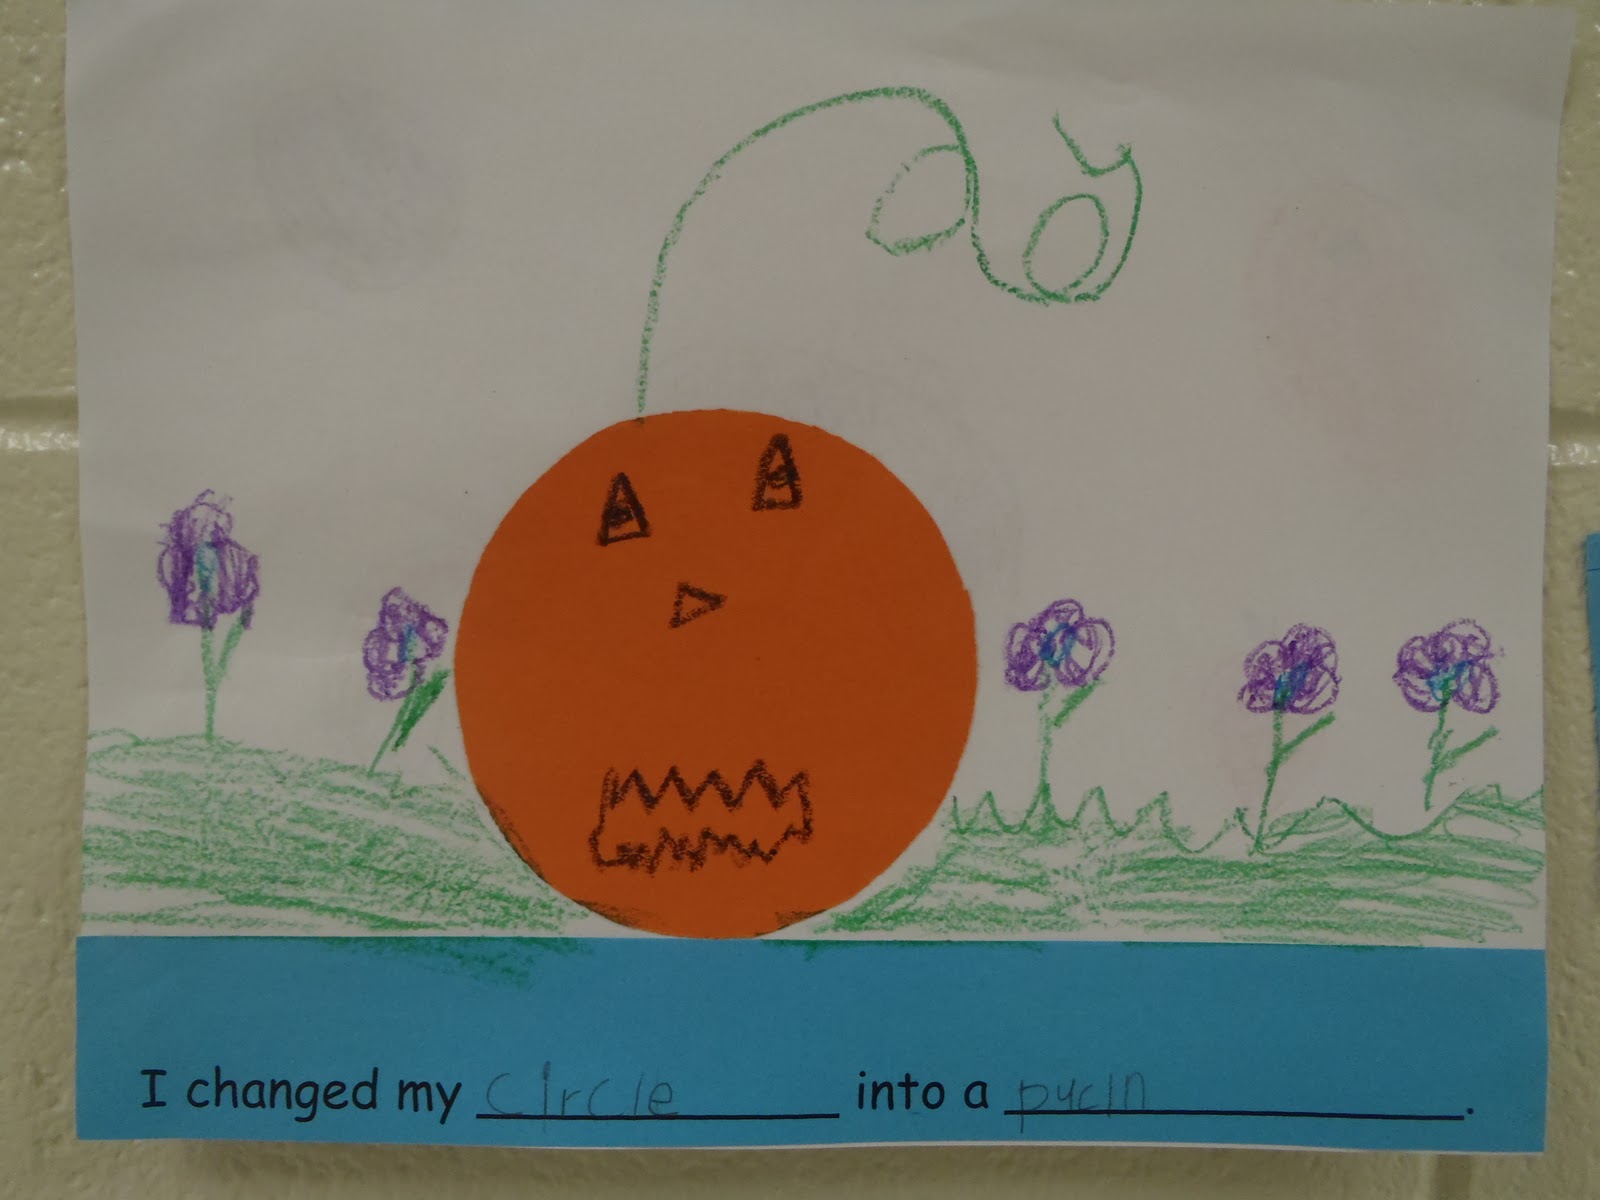
Then we created shape pictures where the students changed a standard shape into something creative for a real-life experience.  These were from the initial lesson {first rotation to that center} but they're so cute I'm going to re-introduce this activity again next week and have them choose a different shape.

"I changed my rectangle into a flower pot."

"I changed my triangle into a jet ski."

"I changed my circle into a pumpkin."

"I changed my oval into a hot air balloon."

Then I put our shape poster, shape pictures and some question stems out in the hallway for a
"Think while you walk" display:

Playdough, ever a favorite, has been another popular station.  If you can roll a snake, you can make a shape!


Because many of my students are still struggling with number ID, I adapted this counting activity from an idea my friend Miss Hisrich used to do.  I wrote numbers in the bottom of ice cube trays for students to read.  Then they put beads into each tray space to represent that number.  {I assess randomly when their time is up by choosing one space to double check.}  They're also working on their one-to-one counting by adding one bead at a time.


The students use tweezers to pick up the beads to stimulate their fine motor skills!

Monday, February 28, 2011

Can you tell me how to get...

...good reading strategies??

We've been talking about reading strategies all year and my kids have gotten pretty good at using them.  In fact, we keep tallies on the board when the kids say "I predict...", "I can make a connection with..." or "When I use my picture clues, I see..."  When they get 10 tallies in any of the categories, we stop what we're doing and have a dance break.  {Usually a HSM song since they're pretty much just super fun.}  I started the tally count to encourage them to use their reading strategies but I figured a visual cue might be just as helpful.  I didn't want to use Cars or Toy Story 3 or anything else that would be out of style in a few years so I wanted to choose something more timeless.  And what's more timeless and classic than Sesame Street?!  So...I created these posters and hope to have them around for a good number of years.  :)


Elmo is visualizing Dorothy swimming around while Bert & Ernie make predictions about Rubber Duckie.

The Count is summarizing a story {as he loves to count, even ordinally} and Big Bird is using his picture clues to tell what is happening in the story.

Zoe and Elmo are making connections to her family while Grover uses his imagination to become Super Grover!

Telly always asks questions {even if it's because he's worrying} to find out more about a story.

Sunday, February 27, 2011

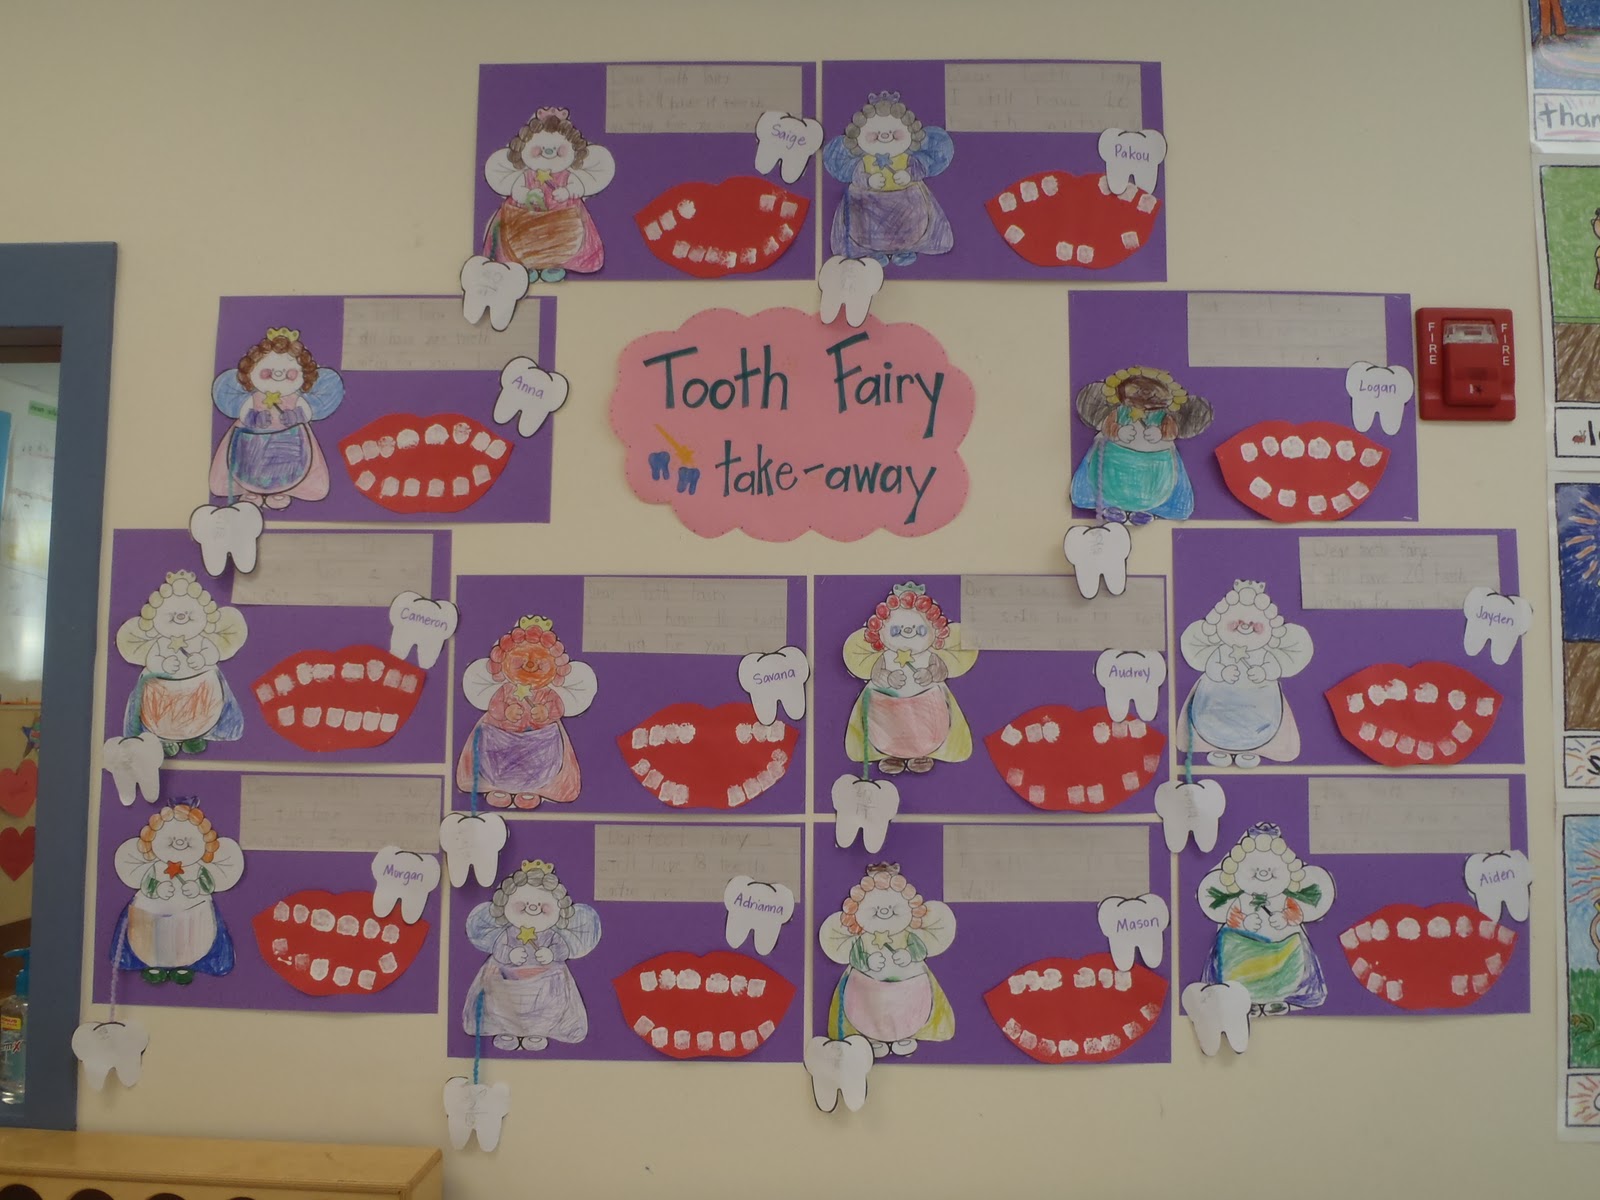
Tooth Fairy take-away.

I promised you a Tooth Fairy...and here she is!  We did a 2 week dental unit and I needed a break from what we've been doing.  Plus I had these adorable tooth-fairy printables in my file {from Mailbox Magazine, I believe} and I was tired of looking at them year after year.  As I typically do, I needed a way to extend the "worksheet" into something different and I think I came up with a great idea!  :)
After discussing how many teeth the kids have, we used sponges to paint the teeth currently in their mouths.  I cut incisors, canines and molars but you have to look closely on some to tell the difference.  If students were missing teeth, they left spaces where their big teeth hadn't grown in yet.

Then we turned their teeth loss into a math problem!  We're learning to add and take away in math so I thought this would be a great integration lesson.  The kids wrote 20 {for baby teeth} subtracted the number of teeth they lost and came up with a total of teeth in their mouths on that day.  We wrote the subtraction problem on a tooth {vertically like 2nd graders!!} then attached the tooth to a piece of yarn which hung from the Tooth Fairy's pocket.  THEN we enticed the Tooth Fairy's visit by turning that math into informative writing.  Science, math and writing in one activity??  Yes please!

Thursday, February 24, 2011

Sight Word Land.

I found a Candy Land sight word game on Mrs. Cooley's blog and LOVED the idea!  I, of course, had to change it a little to adapt it to my class.  I wrote sight words on the back of each card and students have to read the word before they can advance to that colored space.  I differentiated the game by creating 2 levels.  I wrote initial sight words from the beginning of the year {and those that can be sounded out phonetically} on cards with only one color space for  lower level students and harder words {those which can't be sounded out phonetically} on cards with two color spaces for higher students.  I saved the character cards for question words that we haven't technically studied yet since they have the best pay-offs in the game.  I want students to take responsibility for words they don't accurately read during the game so I created this recording sheet for words they need to practice at home.

George and Abe.

After studying George & Abe for the last two weeks, we created the presidents to display with our writing.  I found this George Washington craft on Mrs. Carroll's blog The First Grade Parade and just had to try it out.  They are adorable!  The students brainstormed things they learned from the various stories we read {fiction and non-fiction} and each wrote a sentence or two of their choosing...with a little encouragement from me for them to come up with original ideas.  ;)
"George Washington had hippo teeth because he lost all of his teeth."

"George Washington was a leader in the war."

My favorite fact about Abraham Lincoln is that he liked to play practical jokes and make people laugh. My students always remember the story about his muddy footprints on the ceiling! My second favorite fact is that he wasn't all that organized so he stored important papers in his stove-pipe hat. Which is where I came up with this display idea...


Ta-da!  Our papers are in Lincoln's hat too!

Wednesday, February 23, 2011

Blogging buddies.

My current projects either have paint drying, glue to finish sticking or are otherwise just not finished.  But cute George Washingtons, Abe Lincolns and the Tooth Fairy will be showing their faces by the end of the week!

For now let me just say that I am ECSTATIC about Mrs. Lee's Community Helper unit.  She didn't have her recording sheets available for download but she emailed me EVERYTHING last night.  This is what it's all about, folks.  Sharing sharing sharing.  These are teachers that get it.  Yes we would all love to make more money, but no we aren't all about selling every little idea for a few pennies.  Maybe that's why I feel like I want to go out for a coffee with all of my new blogging buddies.  I feel like we should really be real life friends.  :)  Thank you, Mrs. Lee!  I can't wait to use your centers with my students in a couple of weeks.

And while I'm at it...Mrs. Smith's Dr. Seuss unit and Mrs. Martin's St. Patrick's day units will be premiering soon as well!

Is there such a thing as a virtual Starbucks?!
Blogging tips