Wednesday, November 28, 2012

top tips from an O.T.

You know those teachers who really love their job?  I mean the ones who love kids so much they'll help students who aren't even in their classrooms?  Or on their caseloads?  Or kids they've never even met?

I know one.  And I can't tell you who she is because it's a secret.  ;)  But I picked her O.T. brain to get some help for a few of my students who are really struggling.  I knew from the 1st week of school that these were special cases and extra practice wasn't going to be enough to help them out.  But while I wait to jump through the hoops of proper paperwork, timing and interventions {force smile here} I slyly took matters into my own hands.

And I'm bringing my new knowledge to you!  If you have a student who struggles with any fine motor grips, cutting with scissors, copying from the board, writing letters, coloring a picture, picking things up, zipping zippers or even tracing...tune in!

Some of the activities you're going to see are from Handwriting Without Tears.  But fear not if this program is not available to you.  I will also provide ways to DIY HWT.  {how's that for a teaching acronym?!}

{2 inch binder}
Or an easel...or taping the paper to the wall or a cabinet.  The idea here is to focus more energy on the muscles.  The binder helps with pencil grip because it forces their wrist back and they can't be so loosey goosey or it'll slide.  Using an easel or writing on the wall {or the board!} builds muscle strength.

{playdoh mats}
Be sure they understand proper letter formation even if they can't actually write them yet. Previously I've used any laminated letter card {bubble letters work best} and the tiny tubs of playdoh.  These are larger but what I really like are the arrows to provide some direction.  You could also use a smiley face, star or sticker to show your students where to start.
This alphabet set from 1+1+1= 1 is fabulous and here's a {free} Sight Word set so all your kids can choose this activity or you can make a differentiated playdoh center!

{silly putty}
Silly putty, slime, anything gooey will do, you just want to make sure it isn't too liquidy.  It appears to be regular silly putty but...
A-ha!  It is actually a {pinching practice} treasure hunt!  Your kids use their finger tips to dig {and pinch} and use their fine motor muscles to dig out the gems, fish, jewels...whatever little plastic pieces you choose to hide.

{pop toobs}
Sometimes you can find these at the dollar store or in random toy sections.  They're basically just pieces of plastic that you can stretch out {build shoulder and bicep muscles} then squeeze back together.  They also make a whistling noise if you swing them around your head...but maybe don't tell your kids that while you're working.  ;)
{note: when searching for this item please type "Slinky Pop Toobs" and be aware of Google images.}
{tweezers}
Tweezers & tongs of various sizes are great for fine motor practice.  They can pick up beads, crayons, pop cubes...virtually anything.  I start with bigger tongs and bigger objects then move to smaller tongs or tweezers and smaller objects as the kids improve.  The spots at the ends are for finger placement guidance.

{big dots}
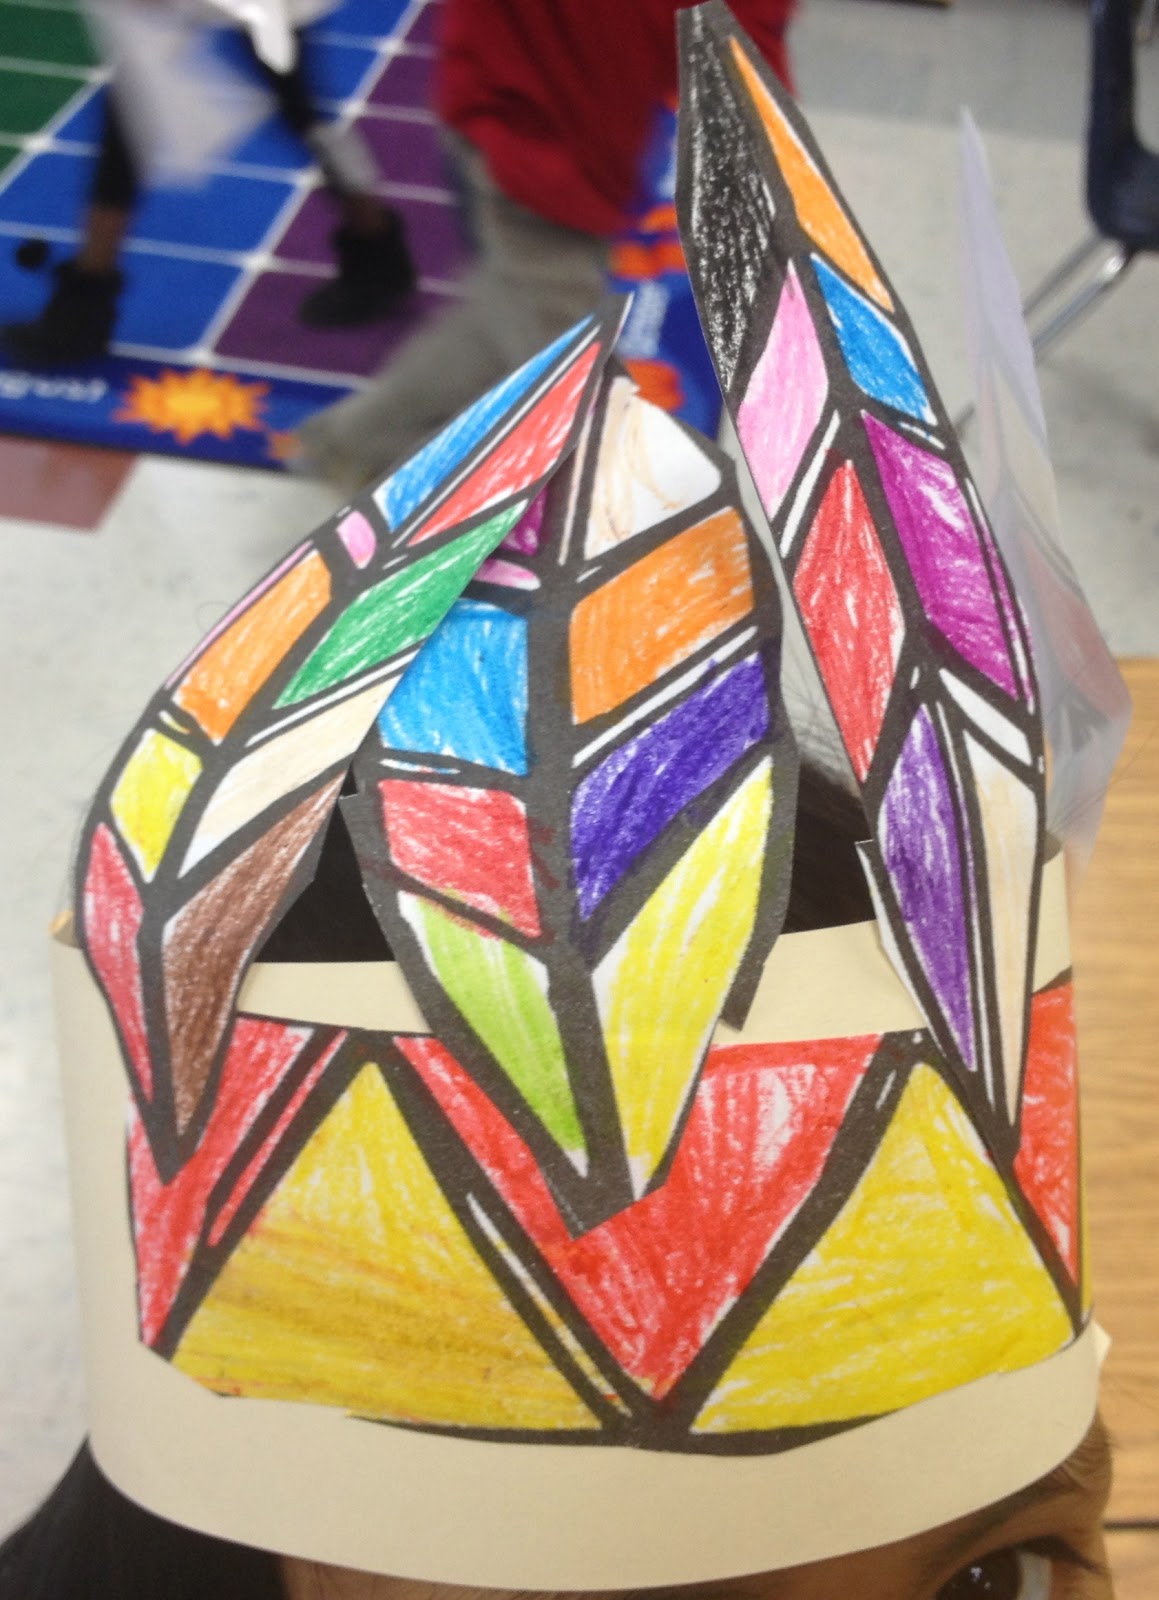
This is a strategy you can use quickly & easily.  Some kids just have trouble staying on a line whether it's walking, tracing or cutting.  You can trace over the lines with a thick marker or add big dots along the way.  When I wanted my student to cut out the Native American headband we made for Thanksgiving, just colored some black dots along the line I wanted cut.  You will be shocked how such a simple, 2 second modification better directs scissors.

{wiki sticks}
Wiki Sticks are basically wax coated pipe cleaners.  The wax allows them to stick together or stick to plastic but not be so gooey that they make a big mess.  I use glossy letter cards but you can print any letter card and laminate them.  It will work just as well.  Bend the wiki sticks to lay on top of the letter then use your finger to practice tracing over the wiki stick for extra directional practice {which is important for letter writing if that skill isn't strong yet}.

{magna doodles}
This is my favorite trick and I don't know how it didn't come to me any sooner!  HWT has these awesome wooden pieces {lines and curves} that you can put together to make capital letters.  They have magnets on the back so you can use them on the board.  Super bonus: if you lay them on a magna doodle like this...
and then take off the pieces...THE LETTER IS MAGICALLY FORMED!!!  Okay, I get it...Magna {like magnets} and doodle...the magnet in the "pen" makes the marks.  But I really never thought it through before and now I am soooo stoked!
In case you don't have the HWT pieces, you can do the same thing on any type of magna doodle board.  This one with lines on it is from Lakeshore and I pulled any random magnet to see if it works.  And it DOES.  Now, a lot of plastic magnet letters only have one little magnet on the back so you'll only get one little mark on the board but it is totally worth it to either add a full magnet backing or {easier option} purchase another set like these.  Then students can trace over the marks to practice letter writing.

{lines & curves}
Love those line and curve pieces, right?!  Well...DIY it!  We actually added extra pieces so we could make both capital and lowercase letters.  It's just 2 regular size popsicle sticks, 2 mini popsicle sticks {from any craft store}, 1 full size pipe cleaner and 2 pipe cleaner halves.
Voila!  Capital A & lowercase a, perfectly formed and in proportion.  :)

I do encourage you to check out the HWT website and see about getting a kit for your school.  {no, I am not an affiliate for HWT nor am I getting paid for this post as a promotional supporter, just giving credit where credit is due.}  Start with the free downloads to check it out.  Maybe grant money or Donors Choose could be an option!

I hope these are new tips for you and that you see some improvement in your classrooms!  Feel free to pin this post for future reference and follow my blog so you don't miss a thing!  I'm always searching out secret tricks of the trade!  ;)

Monday, November 26, 2012

Reading Strategies {freebie}

In case you feel like you've been spending, spending, spending trying to get new items for your classroom, I hope a useful freebie will give you some relief.  :)

This is a short little packet I made up to send home with my families.  I am introducing Book Bags this week and these 3 sheets will go home with my students.  The 1st page is a parent letter that you're welcome to use or tweak.  {It's free so it's doesn't matter so much, right?}  The 2nd & 3rd pages have the good stuff.

There's a bookmark with questions parents can ask their students while reading to help your students really think about their reading.  There's also a Reading Strategies star.  I know there are many, many, MANY more reading strategies than the ones I've listed here, but this is geared more toward your earliest readers.  I wanted to give my kids a tool that would empower them to realize they already know a lot of good tips & tricks instead of listing a jillion strategies they might find confusing.


That's it for today friends!  If you download, please consider following.  You know I love to host a nice giveaway every time I hit one of those milestone marks!  ;)

Wednesday, November 21, 2012

get ready for Cyber Monday!

Here are a few more pictures of our Thanksgiving festivities from this week.


But if you missed the debut pricing, don't worry...because all of my holiday items will be on sale next week for Cyber Monday {plus bonus day Tuesday} on TPT!  Using the code CMT12 you can get 10% off all TeachersPayTeachers products November 26th & 27th.  Many teachers are also further discounting their shops so a lot of your favorite items will be up to 28% off.

All of my holiday themed items will be featured in the additional sale next week:

From my special teacher's helper and myself...

Sunday, November 18, 2012

Thanksgiving freebie & a sale...why not?!

I totally wasn't going to post anything else for Thanksgiving. Then I started planning out our 2 day week and I realized I didn't have anything brand-spanking-new this year {gasp!} and the perfectionistic teacher inside of me wasn't okay with that. So I made a few things, which turned into a few more things....which turned into a 15 page Thanksgiving Packet for you!


I posted the unit on my Facebook page this afternoon with the exclusive info that it is ON SALE {50%} until Tuesday at 9pm EST! That still gives you over 24 hours to get it for only $2. It's a 15 page unit that includes the following activities {and the Common Core standards they meet}:

counting syllables {K.RFS.2b}
making words from the letters in THANKSGIVING {K.RFS.2e}
creative writing {K.W.1 & K.W.2}
making a personal connection {K.RIT.3}
listing activities {K.L.2}
labeling a menu {K.SL.5}
graphing favorite foods {K.MD.3}
distinguishing between wants & needs {K.MD.3}
explaining how to share & think of others  {K.SL.6}
identifying symbols associated Thanksgiving {K.L.6}

PLUS the sample download is an additional 3 page game that works on number identification {K.CC.3} and recognizing color words {K.L.5} which results in a feather headdress to wear!

Happy Thanksgiving friends!  I am truly thankful for all of you!  :)

Thursday, November 15, 2012

Happy Thanksgiving!

I am so excited that there are only a few days left until Thanksgiving break!  Do you get the whole week off or only a few days?  We will be at school on Monday & Tuesday but do you want to know a secret?  I'm okay with that.  Because it is the perfect amount of time to do pilgrim & native american theme days!!  :)

I just made all of my copies & put our vocabulary books together today.  It's one of my favorite Thanksgiving activities because it makes the kids recall information about the 1st Thanksgiving but it also makes them really think about all of the new vocabulary!

Click on the title page for your free copy...word bank included.  Students fill in the vocabulary words then draw a picture to illustrate the fact on each page.  Go ahead and do this as a class.  :)


And what's a fun holiday celebration without a festive treat?!  :)  Oreos, Reese's Miniature Peanut Butter Cups, Candy Corn, Whoppers and frosting needed.  First, split the Oreo.
Spread frosting on the "clean" cookie half and stick it into the frosting side.

 Add a Reese's mini to the frosting for the body.
Add candy corn to the frosting for feathers.
Use frosting to stick a Whopper {any malted milk ball} to the Reese's cup for a head.
There you have...a candy turkey!!  :)  You can add a red hot for the snood {ie the red wobbly thing over the beak} but the kids typically spit those out so I've decided to skip that step!

Also, dear friends, please please do yourselves a favor and check out Scholastic for your Thanksgiving units.  Their website has phenomenal Thanksgiving resources.  Check out the parts of the Mayflower {while wearing your pilgrim bonnet if you so choose!}...
 ...learn how the passengers of the Mayflower felt and research all they had to do while traveling...
 ...chart the journey of the Mayflower across the map...
...and take some virtual field trips through the Mayflower and Plymouth Plantation!  Your students will totally understand what it was like to make the trip.  If you will teach anything about the 1st Thanksgiving, you have to let Scholastic help you!

I've also updated my Thanksgiving venn diagram.  Thank you for the reminders!  ;)  Instead of putting the current year, I just put "Thanksgiving today" so you can keep a copy in your file to use year after year.  Click for your free download.

Happy feasting!

Tuesday, November 13, 2012

Mister Seahorse {Eric Carle}

This week we hosted Family Literacy Night for our parents and each grade level was assigned an author to study.  Kindergarten got Eric Carle...woot woot!  All of the popular books were snatched up so I ventured to the library for something different.  And that is how I met Mister Seahorse.

This is actually a really cool book!  It teaches kids about different types of fish and how they carry their eggs.  Bonus if you really pay attention: all of the egg caretakers are the dads.  Interesting!

I knew I wanted to do something with camouflage because a really cool aspect of the book is that there are acetate pages {ie old school transperencies} that you have to look through to find the animals.  It's a neat lesson in camouflage because you can peek behind the painting to the fish that's hiding then cover it back up to see if you can see it once you know it's there.  The kids loved it.

Mom to 2 Posh Lil Divas had a neat seahorse activity so we got some white paper and started using watercolors.  I was a little nervous but the kids did great.  They had total freedom to use whatever colors they chose and I love how different they all turned out!

I cut them into seahorses after the painting was dry.  If we were doing this project later in the school year I totally would've done this camouflage activity from Mrs. Parker but it was a little too advanced for us at this point.

Instead we water colored blue paper with the same set of paints and the result was still beautiful colorful camouflaged seahorses!  {complete with sparkly dots of course}
Here are some other Eric Carle ideas from my teammates.  Feel free to pin them to your literacy collections.  I had so many author study ideas that I had to make a separate Book & Author Study board!

{The Grouchy Ladybug}


{The Very Hungry Caterpillar}


{The Very Busy Spider}


{Eric Carle inspired art}

Happy Reading!  :)
Blogging tips